
Yamaguchi Framebuilding School - Day 1

Panoramic view of the Yamaguchi Framebuilding workshop.
Koichi Yamaguchi is a renowned bicycle frame builder with nearly 50 years of experience building high-performance bicycles for Olympic athletes and world champion cyclists. Earlier this year, I learned that he resides in my home town of Rifle, Colorado (small world!). And even better, he teaches a two-week course where students build a classic steel bicycle frame. After driving cross-country over the weekend, today was the first day of class!
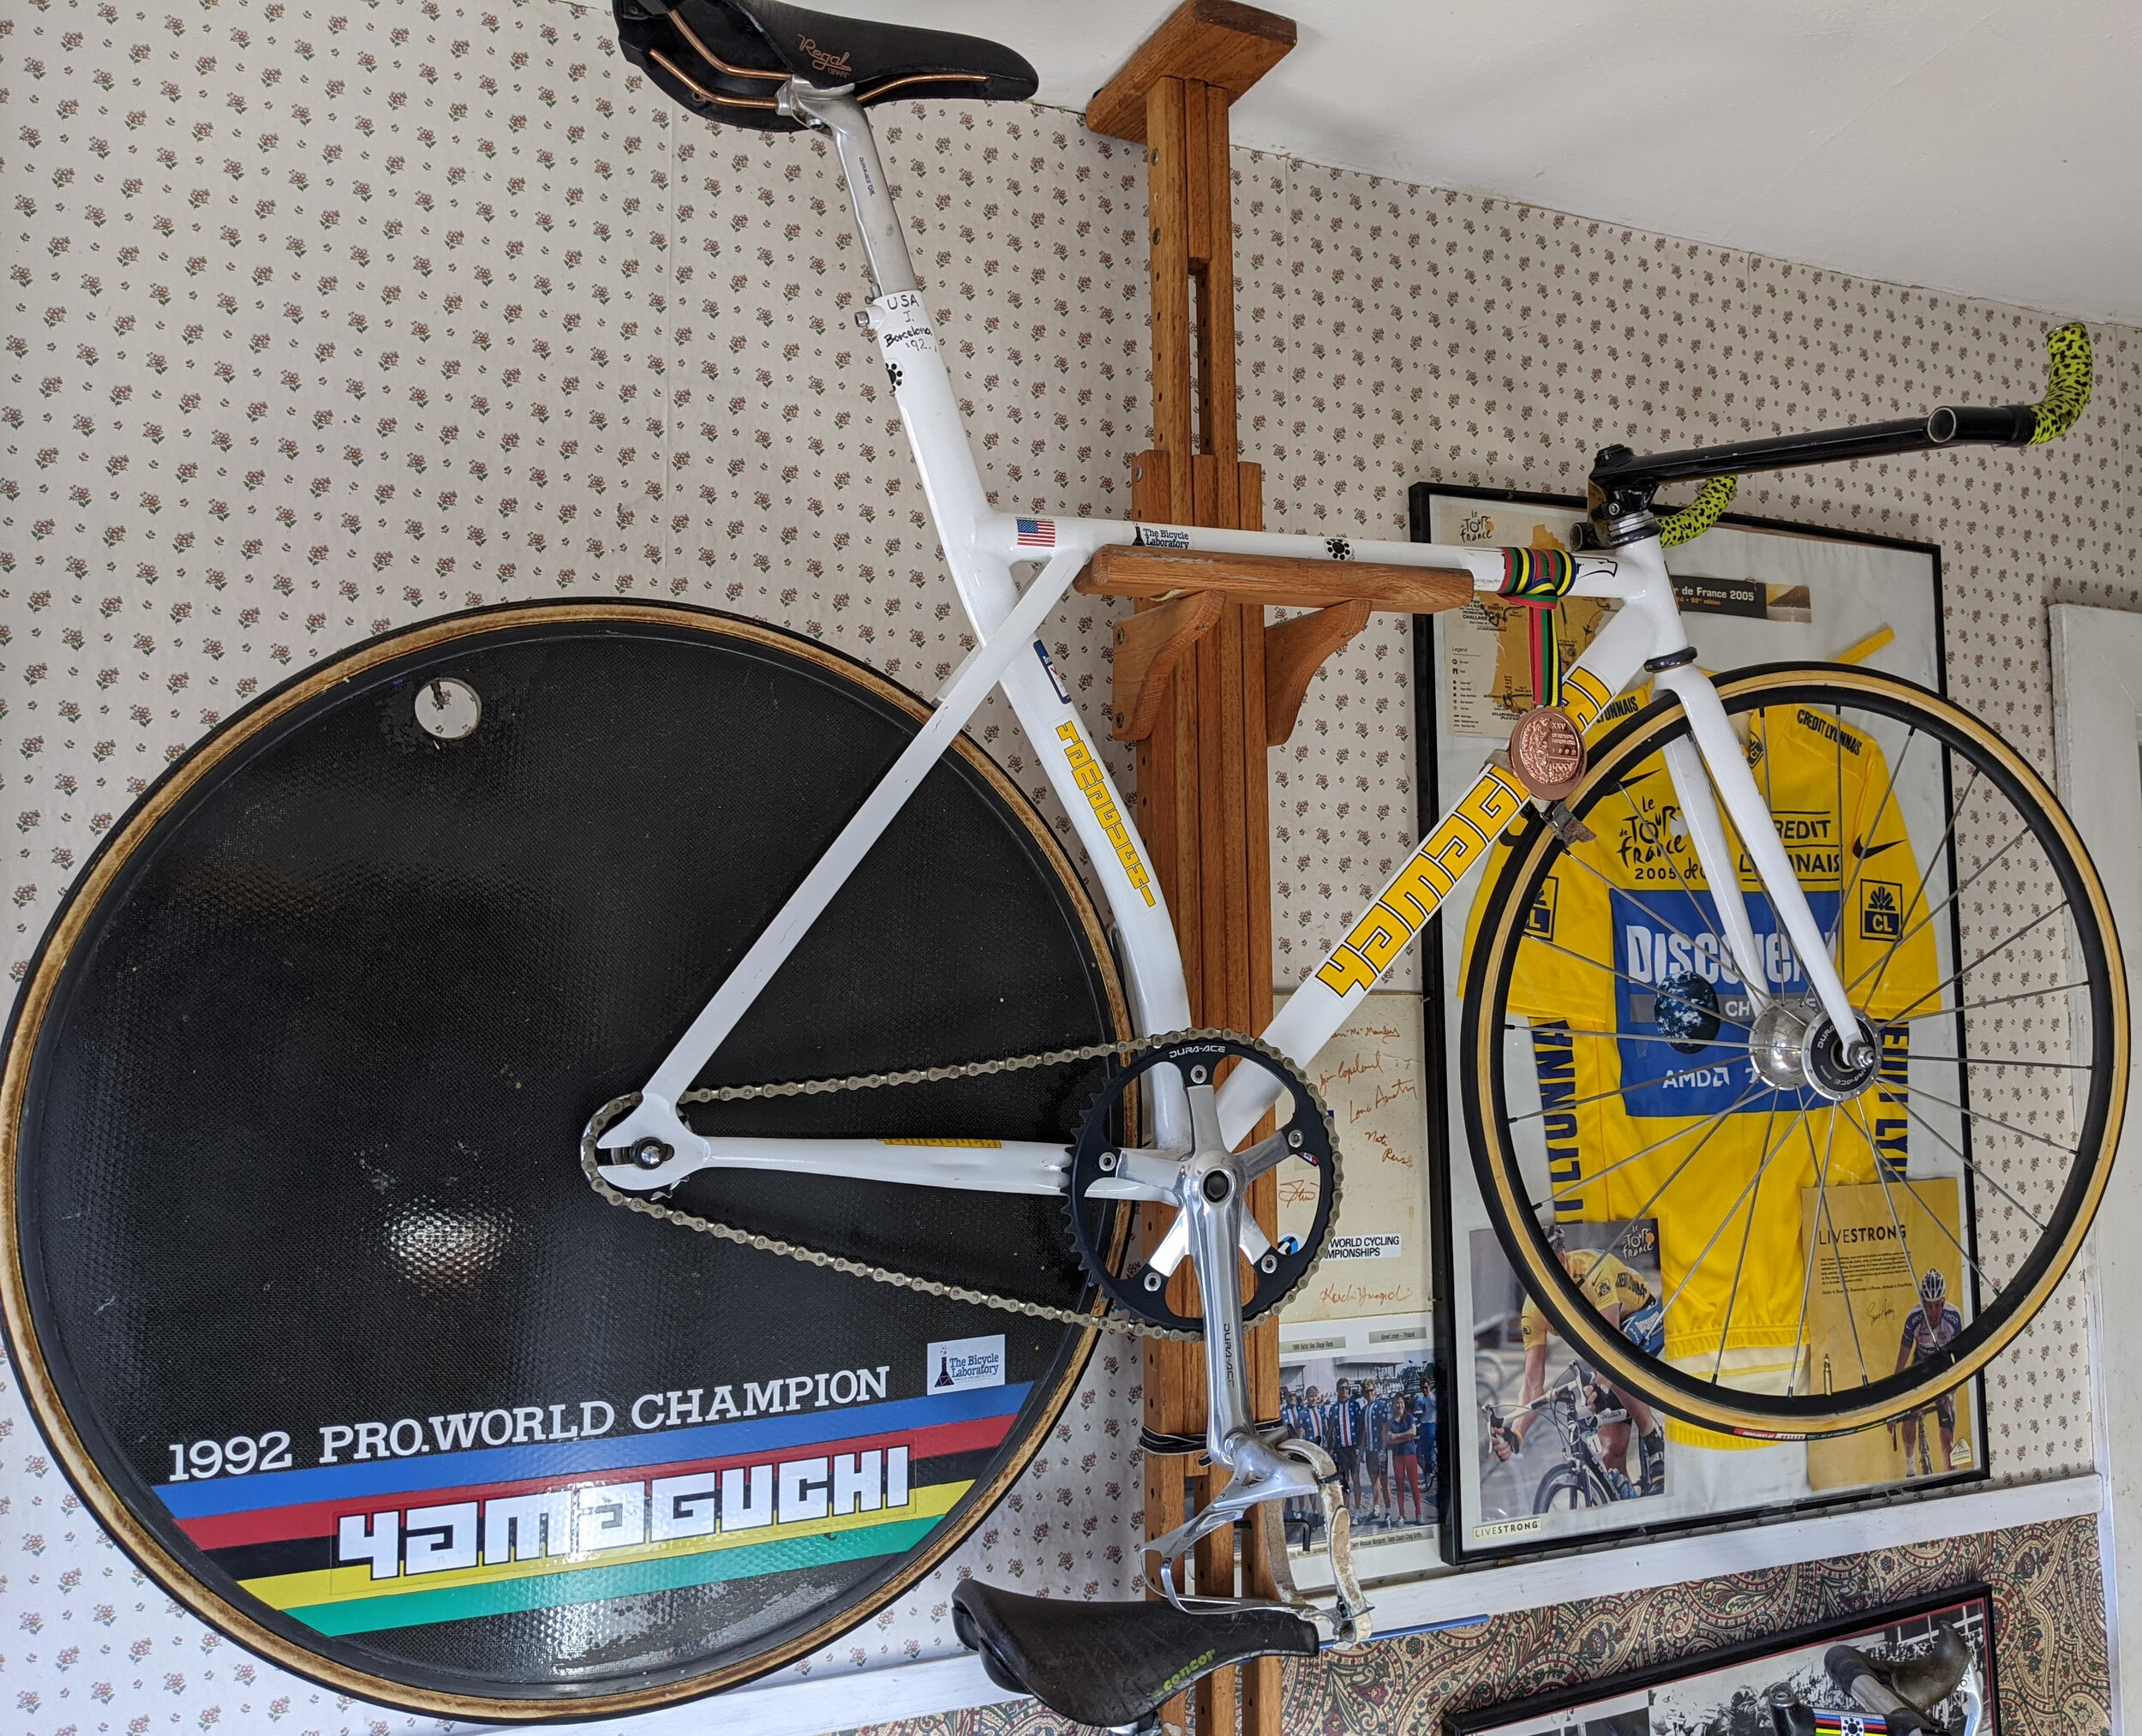
Upon arrival this morning, Koichi gave me a wonderful history of
modern bicycle frame building, beginning in the 1930’s. His home is also something of a museum, with historically important bicycles and frames adorning the walls, perched on railings, and hanging from the ceiling! We moved into his design studio and had a long discussion of his history in the bicycling industry. Koichi is a veritable encyclopedia of knowledge - being both a master framebuilder and a certified cat-1 race mechanic.
I was completely fascinated, and we spent the rest of the morning discussing cycling history, philosophy, and practices.
After lunch, we began to get to work. First thing: measurements. The end goal of this two-week class is to build a totally custom bicycle frame, specifically tailored to my physical dimensions. Included with the class is a design manual, which outlines the procedure for translating the rider’s body measurements to the proper dimensions for the frame.
However, there is more to designing the frame geometry than the rider’s measurements. The intended usage of the bike, and the ride characteristics that are desired also play a major role. Koichi and I discussed this at some length. I said that I wanted a bicycle with highly responsive steering, good performance when accelerating and sprinting, and sufficient durability to survive urban riding in DC. Based on this conversation, and my body measurements, we decided on values for critical frame dimensions such as the seat-tube and head-tube angles, bottom bracket drop, and fork offset.
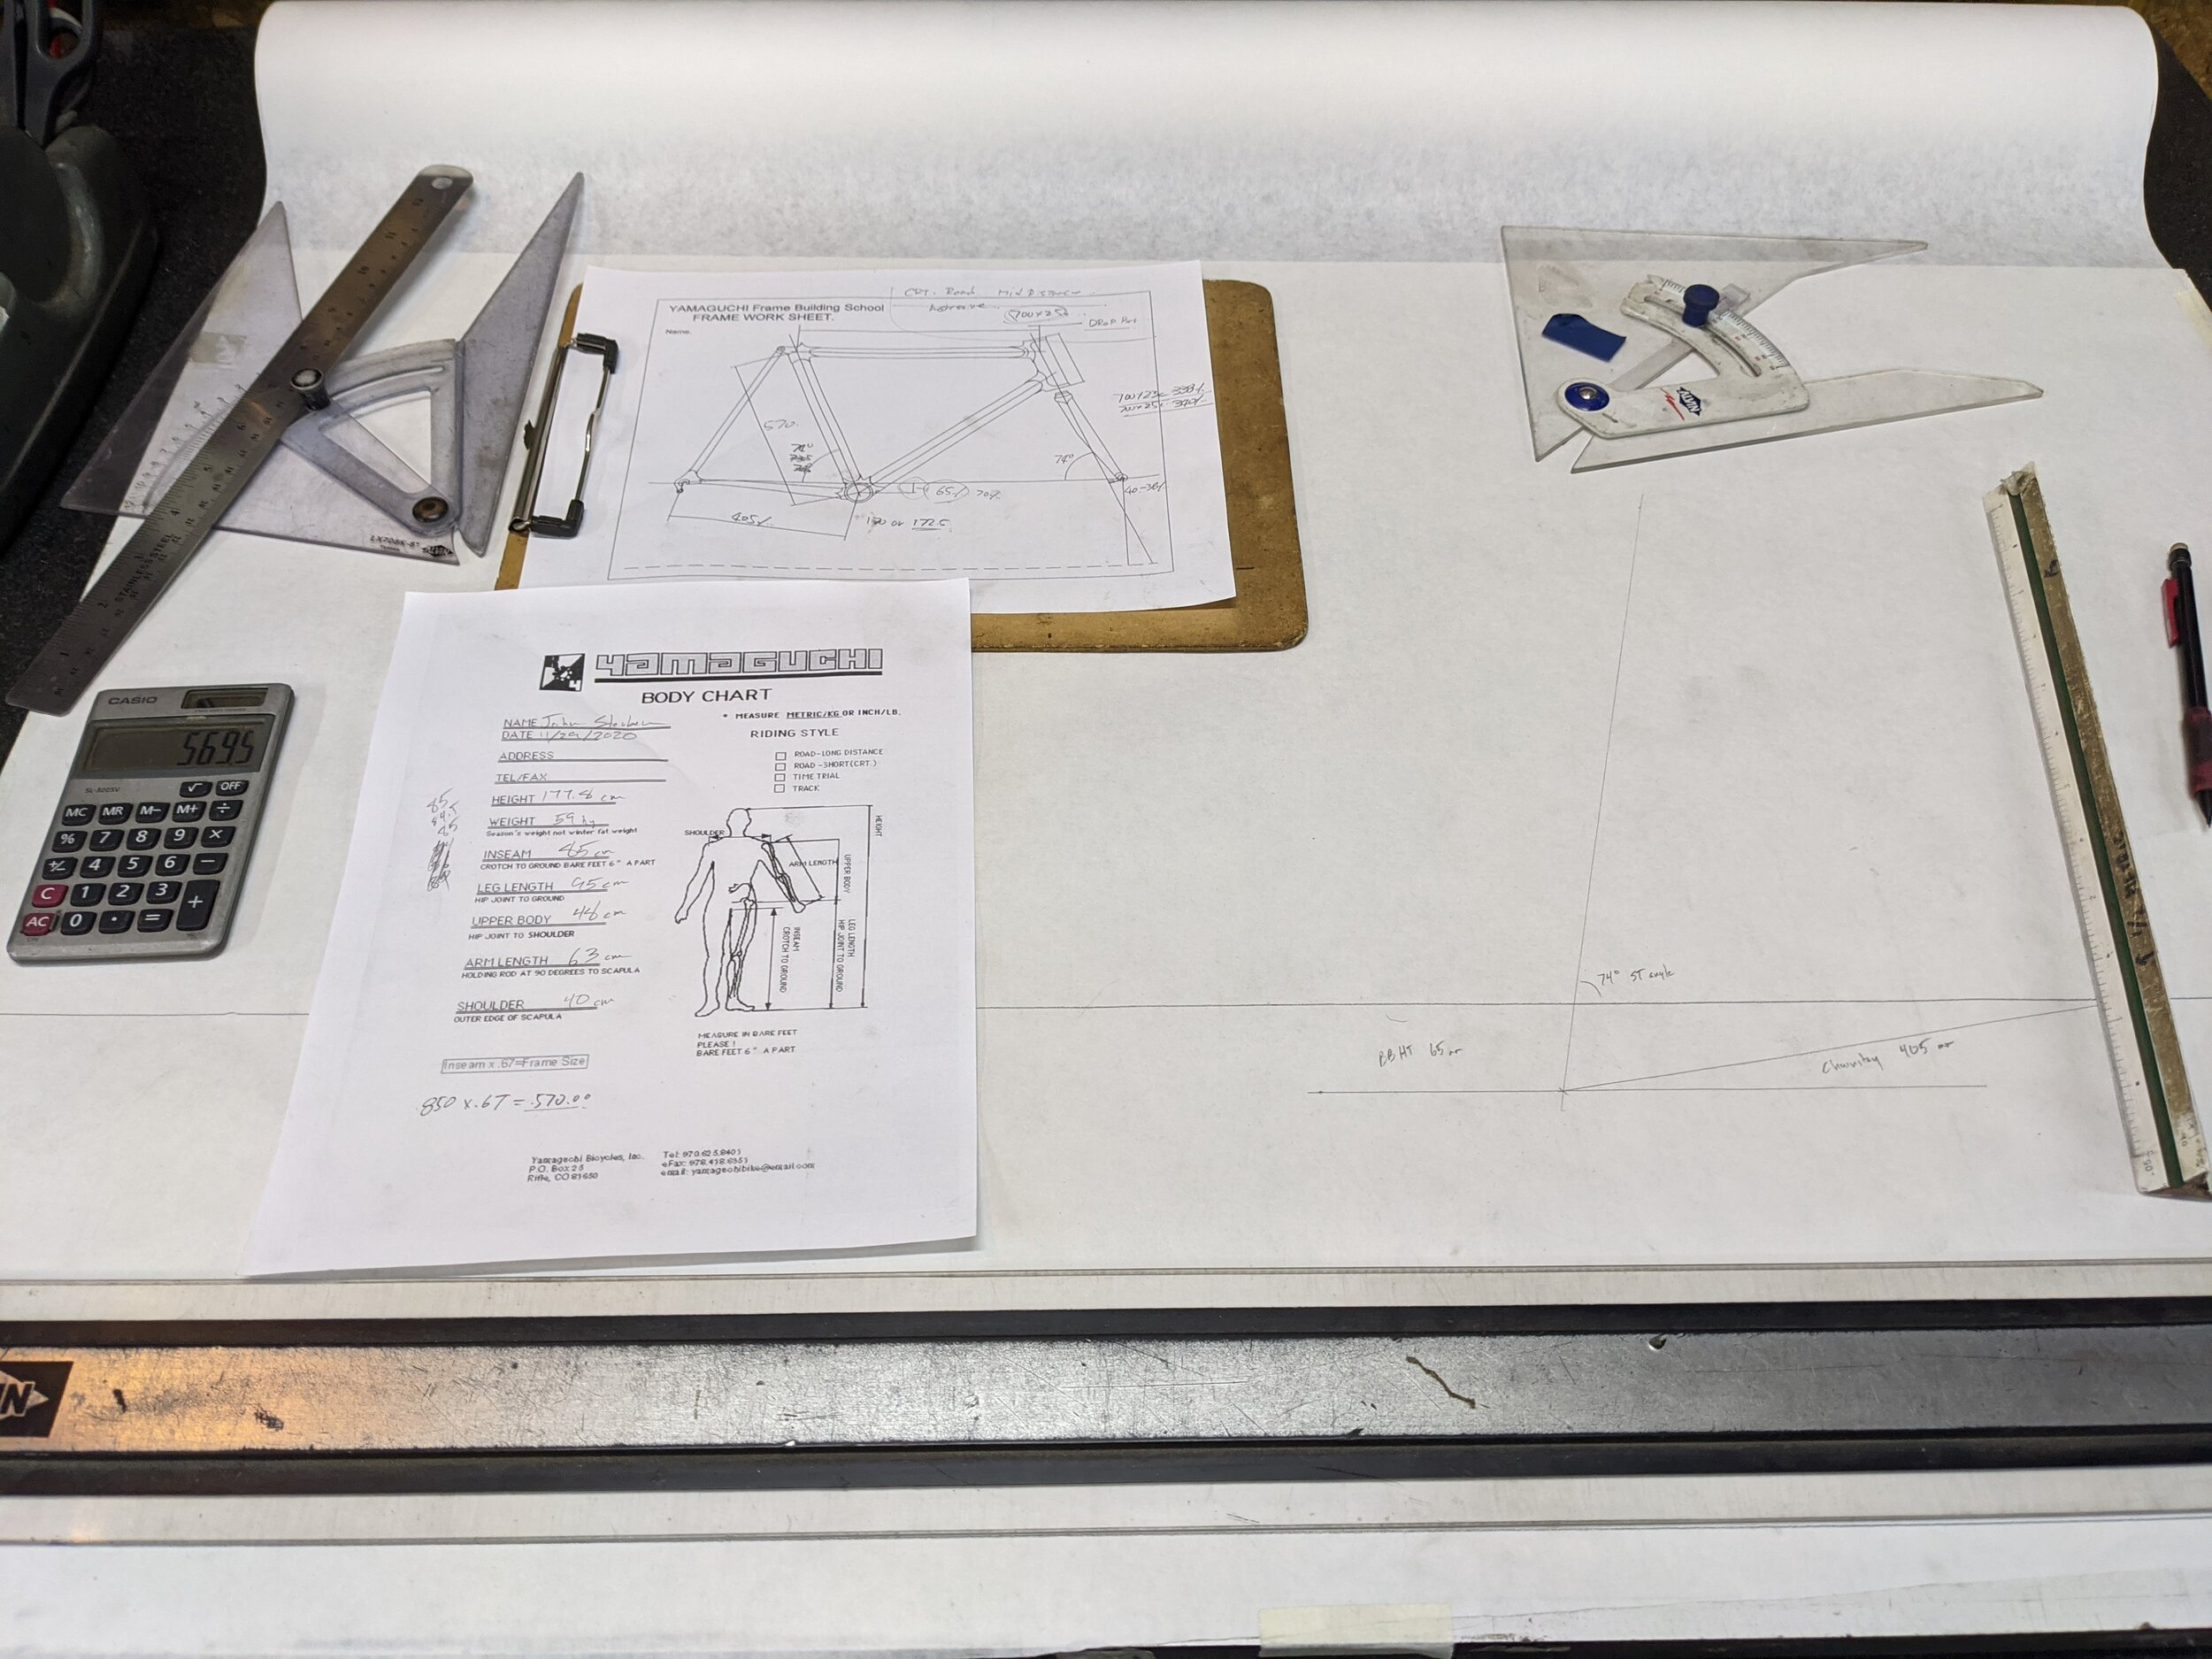
Once we had determined all the important values, Koichi brought out a large roll of paper and drawing tools. We drafted the frame by hand in one-half scale. Interestingly, Koichi told me that many classic European framebuilders never diagrammed their frames before starting! To me, the value of the drafting process is obvious. In addition to defining all the tube lengths and miter angles, the scale drawing allows for critical clearances to be checked quickly and thoroughly.
With the dimensions of the frame established, Koichi proceeded to select an appropriate set of tubing to serve as the raw material. In addition to the long tubes, we also selected a set of dropouts (for holding the rear wheel axle), a fork crown, and a bottom bracket shell. The dropouts and fork crown are cast steel. The frame tubes are chrome-molybdenum alloy steel, manufactured by the Italian firm Columbus. The whole collection barely weighs a kilogram.

Some assembly required…
Tomorrow’s tasks include cutting the head tube, and brazing practice. I’ve never done any welding via the brazing method beore. Koichi says “that’s good, you won’t have any bad habits to break.”